
 Maintenance Connection Everywhere (MCe) · EAM/CMMS manuals
TL;DR
In MC
- there are user accounts for logging in, this contains their passwords and whatever, typically they, choose as their user name.
- There are labor records/users which are associated with the work. These may be limited e.g. service request users all the way to full powered admin users.
- The login accounts and the labor records need to be connected for the login accounts to have any real value.
- The labor records/users can stand alone, either connected to someone who can log in, or just be there for tracking hours of work etc..,
So it is necessary to :
- Create the login account, if the person doesn't have one
- Create the user/labor record. (This step can be done as part of the next step)
- Connect the two together. (And this step can optionally create the user/labor record.)
Details
If you are an Administrator and you want a user to sign up
Give them your signup URL, it will typically follow the format: https://<yourdomain>/mce/#/signup, there are other ways, if you have one you use, you can give them that. On our SaaS, typically this will be https://<yourkey>.mycmms.ca/mce/#/signup.
You will send the user:
- the URL to sign up with
- the database key(s) they need to sign up
- Optionally instructions. There is a user document User Login Sign-up that you might want to give users. It is essentially the next section but worded for individual users..
Then, after they have signed in, you skip down to the "Approve User who has signed up" section
If you are an Administrator and you want to create the login account for the person
Follow the steps directly below. This allows you to pre-set up the account for a new employee before they start work.
Then, continue when you get to the "Approve User who has signed up" section
Step1: Select Sign Up button from the main screen of MCe application.
 if the URL you are using doesn't go directly to the next screen.
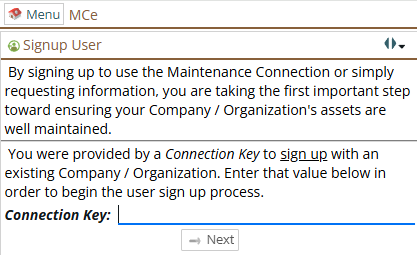
Step2: From Signup User screen, provide Connection Key.
This is the key used to access the desired database. Your company may have more than one production, and may have test/training databases, or you may only have one database. If you have more than one, they may in addition be at different URLs.
After entering it, press the Next button.
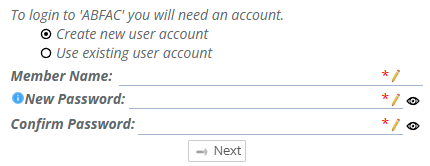
Step3: Create new user or select existing user.
Then provide member name and provide password. If the user is already created and you need to sign them up for different db then select existing user. Although in this case, you may need them to do it since you won't know their password.
Step4: Provide additional details, in below screen and press Next button.
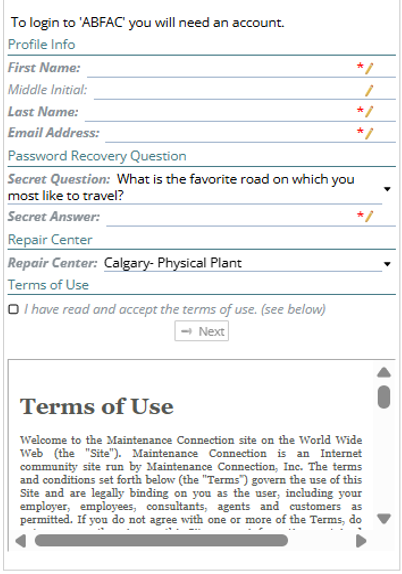
Step6: Now you will get the message of successfully signed up.
Press OK button.
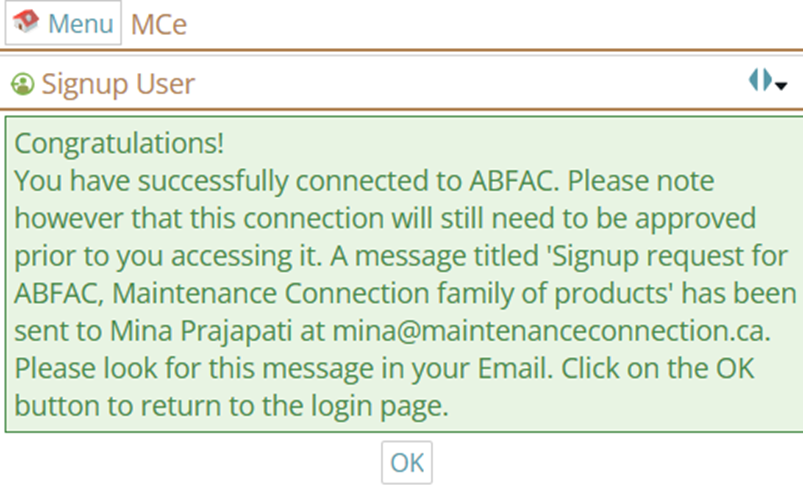
Approve User who has signed up
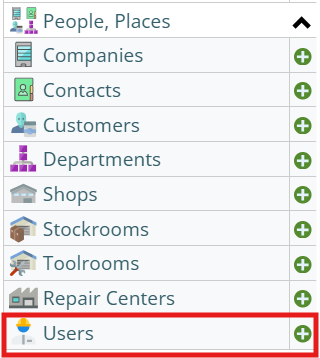
Step1: Select “People, Places” from main menu. Then select Users option.
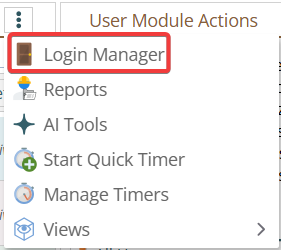
Step2: From three dot menu select "Login Manager".
Step3: Approve user access and select Type. Then provide Access group and craft.
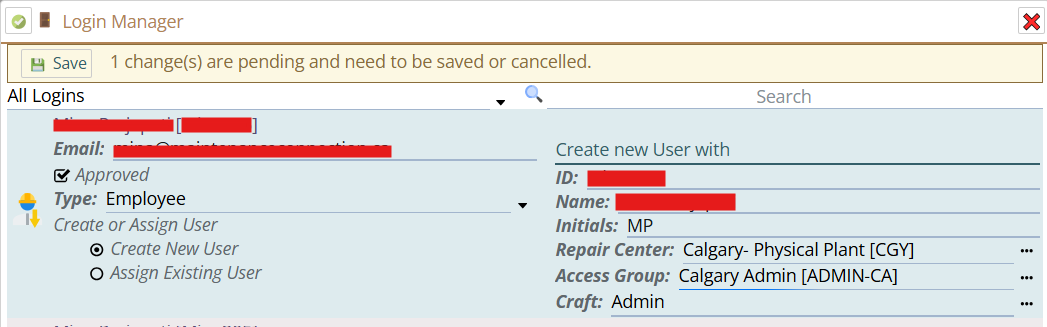
Select Create New User from above screen or select assign existing user if you need to assign any existing user.
Step4: Then Press Save button from Login Manager screen and press check mark button.

After successful approval (Save),, it will show user like below:
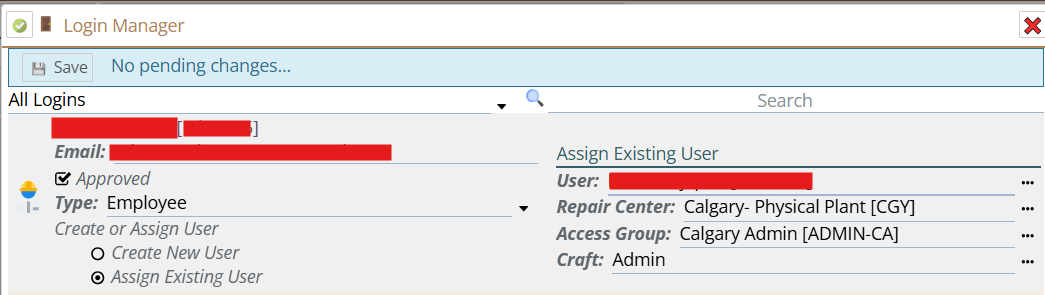
Assign Licenses
If you have not assigned by access group or some other way this user will get their licenses, you will need to assign licenses.
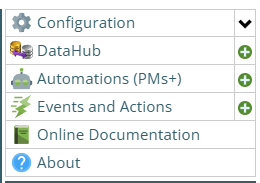
Step1: Select Configuration from main menu.
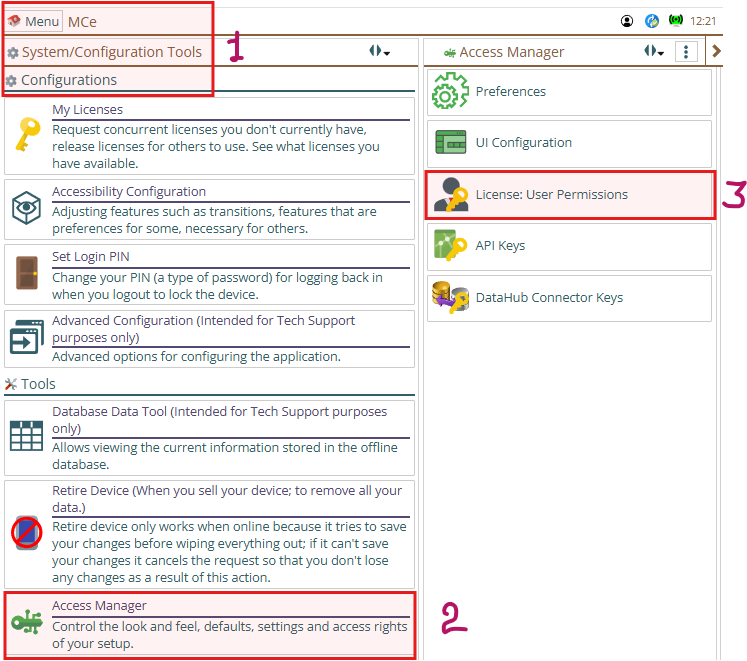
Step2: Then choose Access Manager >> License User Permissions.
Step3: Then Select License from installed licenses and provide user/group/repair center/all users access.
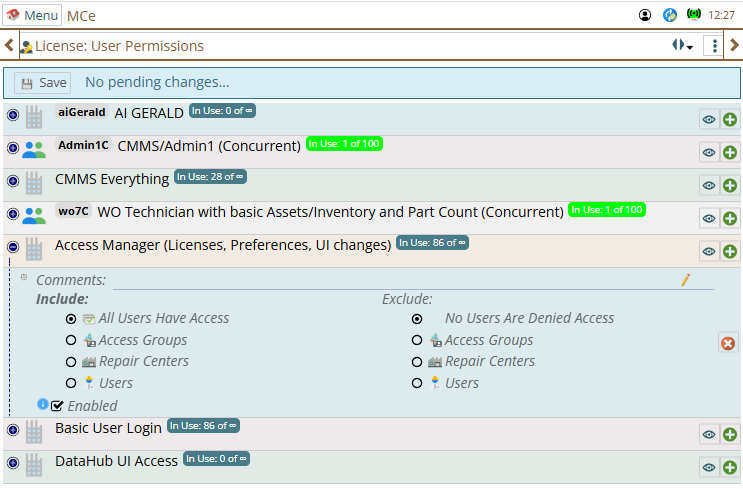
You can deny access for any user/access group/repair center/all users as well by Exclude option.
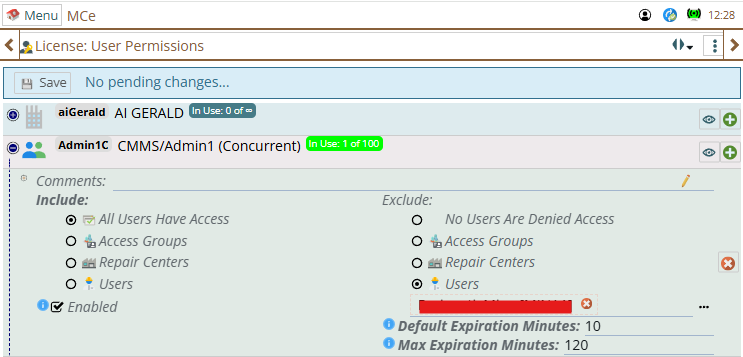
Step4: After assigning licenses, you need to press Save button to save changes.

If you release a license, you may need to reacquire it.
Step1: Reacquire a license for yourself
If you want to reacquire a license for yourself, select Configuration >> My Licenses from the main menu.
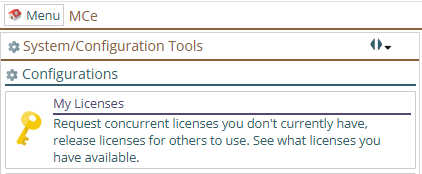
Step2: Acquire required license from the list by click.
Key symbol licenses are not acquired yet. You can acquire them by a click.
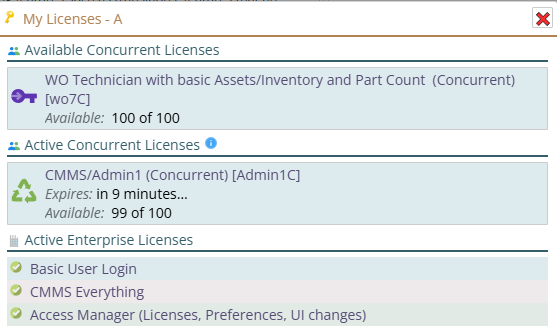
After acquiring license, Key symbol coverts to as shown in below. It also says for how much time, license is acquired.
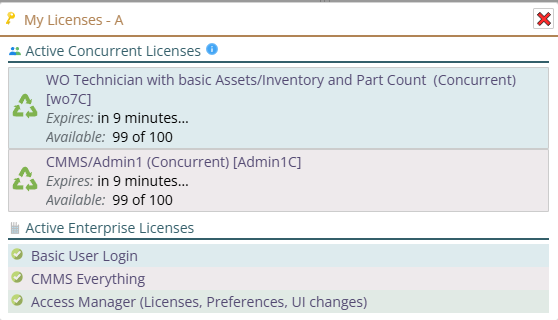
Press red X button to close the My Licenses window.