
 Maintenance Connection Everywhere (MCe) · EAM/CMMS manuals
TL;DR. 5 minute one time setup
This document outlines configuration required to automatically copy photo(s) from a failed task to a newly generated follow-up work order.
Note that in a similar way you can also copy Failed Task Comments.
Important: The following is an ITIQPro MCe exclusive feature. If you close the work order in another product including Accruent's MC, the photos will not be copied to the follow-up work order because they do not have this feature. As long as the person who closes Work orders does it in MCe, this feature works nicely.
It takes about 5 minutes to setup if you are familiar with our Preferences, a little longer if this is your first time changing preferences.
Details
1. How to Set It Up
To enable this feature, the system preferences must be explicitly configured at the organizational level because the follow-up generation processes on the server, there is no user associated with the process so user/access group level preferences will be ignored.
Getting to UI Config
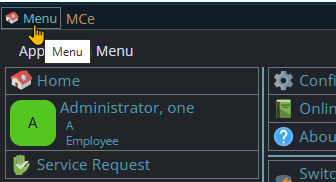
Start by clicking on the main menu button on the left panel, top left portion.
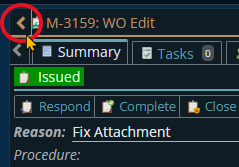
If the menu button isn't visible, you are likely on a screen too narrow to see everything, press on the left pointing gold button to take you so you can see the menu button.
Variation 1: What you have access to
Depending on the size of your screen, what products your company has purchased and what rights you have been granted, the choices in the menu will vary.
Variation 2: How wide your window is
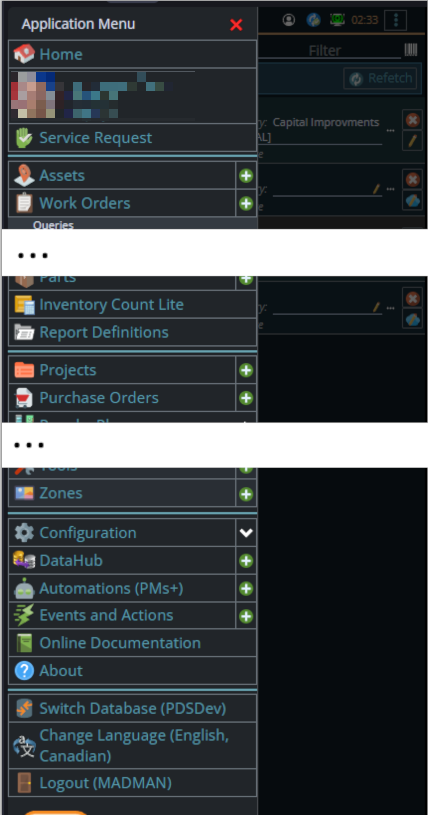
The menu will show up as 1, 2 or 3 columns depending on how wide your screen is.
If you are on a cell phone, and some smaller tablets in portrait mode or a narrow window on a laptop or desktop, you'll see the menu as one column that you scroll through using your finger or the scroll wheel or the scroll bar depending on your device, browser and whether you have a touch screen or not.
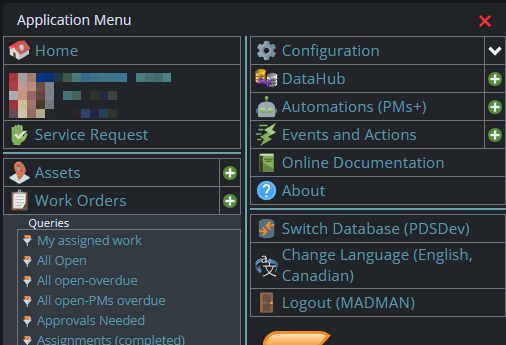
A bit wider, some cell phones in landscape, some tablets in portrait, most tablets in landscape and 'somewhat' wider laptop/desktop, will show it as 2 columns wide, with the middle column available on the left by scrolling down
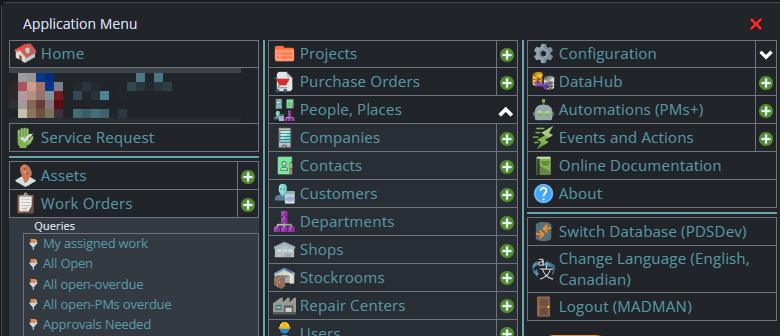
And wider screens, some landscape tablets, and wider windows on a laptop or desktop show it as 3 columns. If you have all the dropdown sections expanded, it may still require vertical scrolling to see all the choices depending on the height of your device or window.
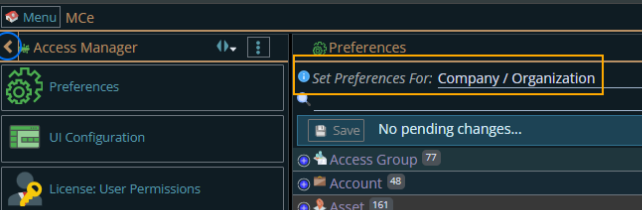
1. Ensure the top dropdown configuration field reads exactly: Set Preferences For: Company / Organization. The settings we are going to be working with have no way to work at a user or Access Group level because it is running at at time when there is no particular person associated with it, so there is no user or access group associated with the WO when the task photos would be being copied to the follow-up work order.
2. Locate the setting row under Work Order > General > Followup Work:
- Copy Failed Task Photos
3. Open the dropdown selector on that preference row and change it to the setting you want such as to 'Photo 1 and 2', the default in a new system is 'Do not copy '.
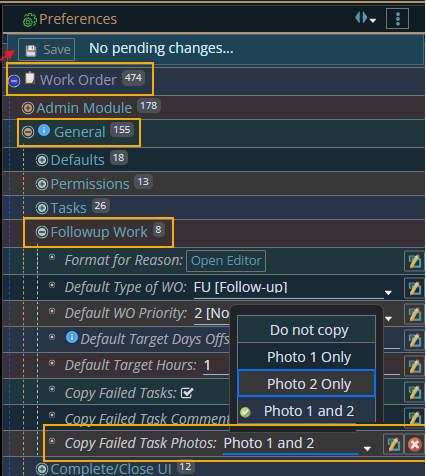
4. Check the 'Copy Failed Tasks' it also has to be set to true (checked), by default it is not.
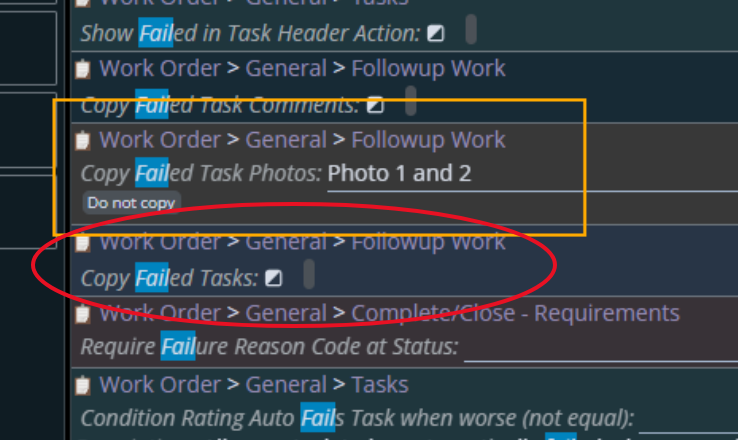
5. If you want this to happen automatically, a) you have to have set the 'Create Follow-up WO(s) Default" to either 'Single WO for all Failed tasks' or 'Separate WO(s) for each Failed Task'. If it is blank or 'None' it will not create a follow-up unless the user selects one.
b) you may want to use Preferences to then HIDE the 'Create Follow-up WO(s)' in the UI so no one will set it to 'none'. OR you may want to leave it set to your default and let whoever is closing make the decision as to whether to create it/them or not.
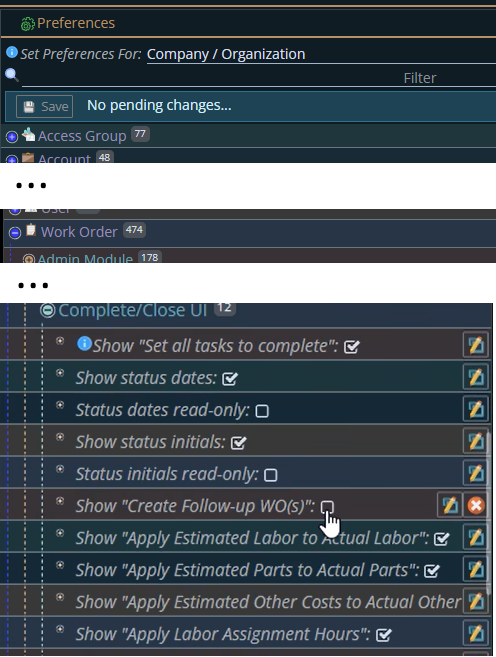
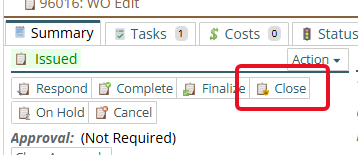
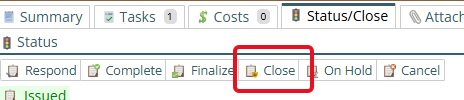
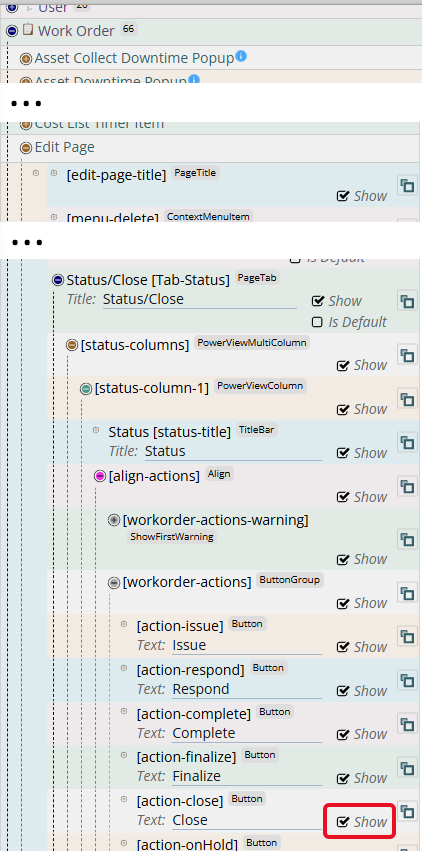
c) Critical: You must use UI Config to HIDE the "close" 'quick status change' buttons, because they will ignore this setting and it will NOT create a follow-up regardless of what this Status/Close Action box is set to.
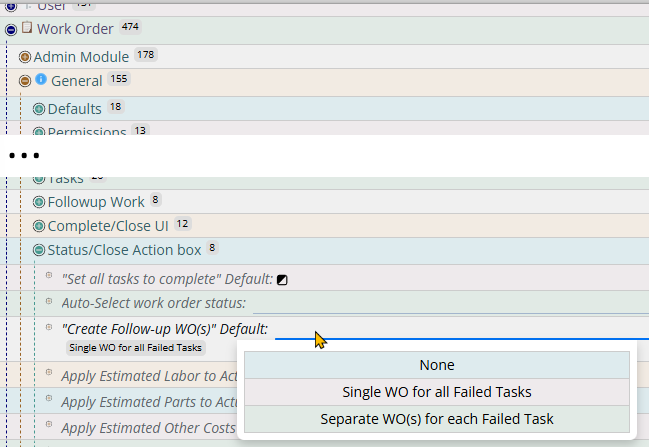
Note that the following choice will only show up if you have at least one failed task on the work order:
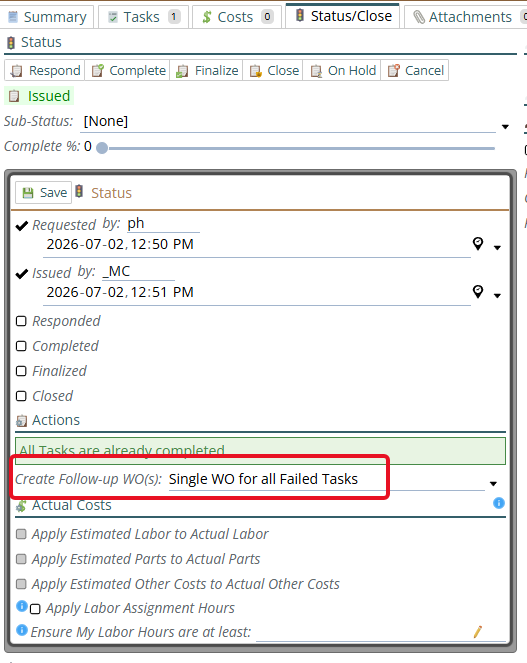
Hiding the Create Follow-up WO so default is forced
If you do this, users will NOT be able to change it from what you set, so your chosen setting will happen automatically. And if it is set to none, then there will be no follow-up work orders, which is not what you likely want if you are reading this documentation page.
Getting to UI Config
Start by clicking on the main menu button on the left panel, top left portion.
If the menu button isn't visible, you are likely on a screen too narrow to see everything, press on the left pointing gold button to take you so you can see the menu button.
Variation 1: What you have access to
Depending on the size of your screen, what products your company has purchased and what rights you have been granted, the choices in the menu will vary.
Variation 2: How wide your window is
The menu will show up as 1, 2 or 3 columns depending on how wide your screen is.
If you are on a cell phone, and some smaller tablets in portrait mode or a narrow window on a laptop or desktop, you'll see the menu as one column that you scroll through using your finger or the scroll wheel or the scroll bar depending on your device, browser and whether you have a touch screen or not.
A bit wider, some cell phones in landscape, some tablets in portrait, most tablets in landscape and 'somewhat' wider laptop/desktop, will show it as 2 columns wide, with the middle column available on the left by scrolling down
And wider screens, some landscape tablets, and wider windows on a laptop or desktop show it as 3 columns. If you have all the dropdown sections expanded, it may still require vertical scrolling to see all the choices depending on the height of your device or window.
Note that if you change it only in the WO Technician Edit page, Administrators will be able to change it but technicians won't
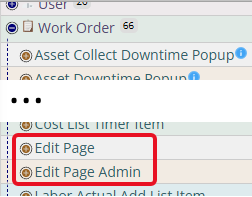
To hide the Close action button on the Summary tab:
And then the setting to show or hide it:
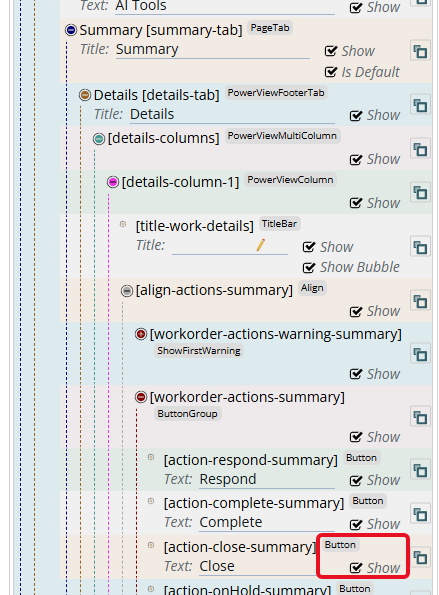
And then to close the Close action button on the Status/Close tab:
And then the setting to show or hide it:
5. Click the global Save button in the top preference header
2. How It Works
Once configured at the company level, the backend automation actively monitors task completion results during the standard field technician closing routine:
1. A user opens an active work order containing tasks.
2. Under the Tasks tab, the user toggles the checkbox status for a target task to Failed.
3. The user uploads or captures an image directly into the task's individual Photo 1 and/or Photo 2 slot.
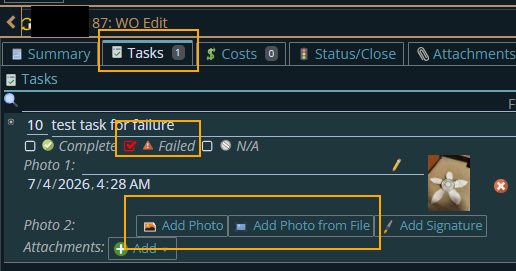
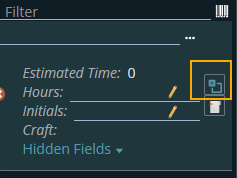
Note: Depending on how your Administrators have set your system up, you may need to press the expand button to see the photo section.
4. The user completes any mandatory operational closing requirements (e.g., adding a labor entry line on the Status/Close tab).
5. The user clicks Close button or sets the closed date and then hits Save in the Status inline dialog.
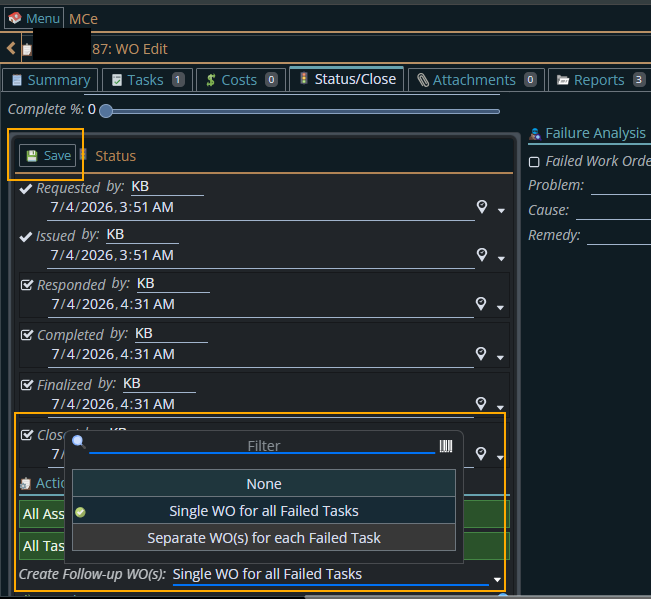
6. The system marks the current parent work order as closed and read-only, automatically triggering a background server script that creates a linked follow-up work order containing the uncompleted, failed task(s) item.
3. What It Looks Like:
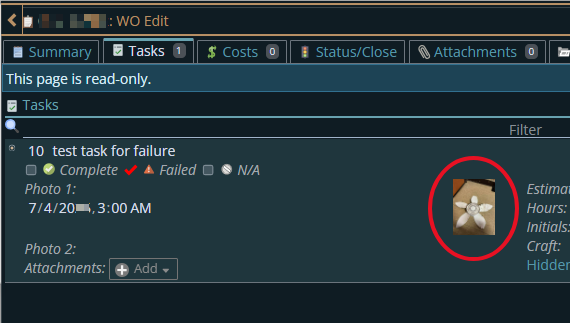
When the background process creates the follow-up work order, the requested image or images are transferred into Location Exception: The transferred image will not appear inside the general file grid under the main work order Attachments tab.
- Expected Result: Instead, the photo payload automatically maps directly back into its native task line structure. Open the newly generated follow-up work order, click on the Tasks tab, and view the task details(click Show Details). The image file will be perfectly intact and visible directly within the Photo 1 or Photo 2 placeholder field.
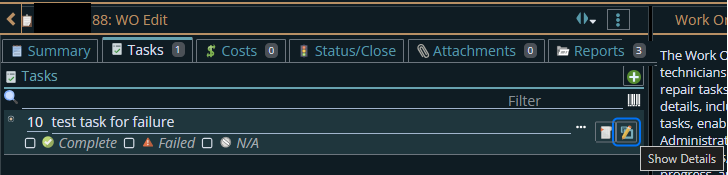
And here it is as the follow-up work order