

 Maintenance Connection Everywhere (MCe) · EAM/CMMS manuals
MCe upgrades are relatively easy and usually take a small amount of time (minutes, not hours.)
Prepare:
Preparation
1. Download the Latest MCe installer
1. Download the latest MCe installer
- You will need to visit the download page to download the installer/upgrader: https://files.maintenanceconnection.ca/
- You will be asked for the Name, and the Download Code, so enter your name for the name field and then enter the download code "MCeLatest1", then hit the button "Download Now" when the button turns blue to start downloading.
Enter in your info
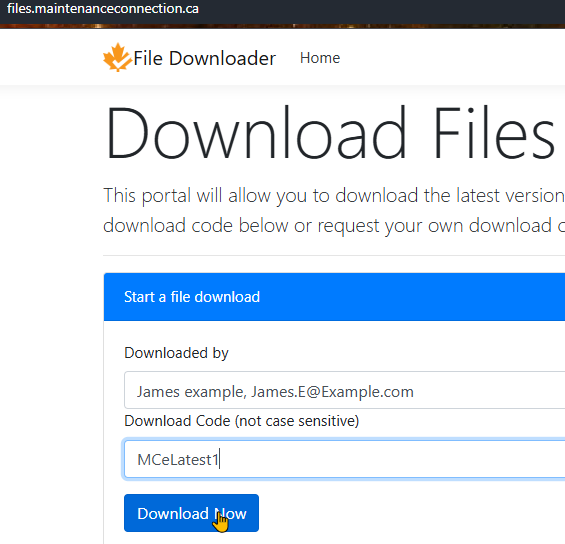
Starting to communicate with the server
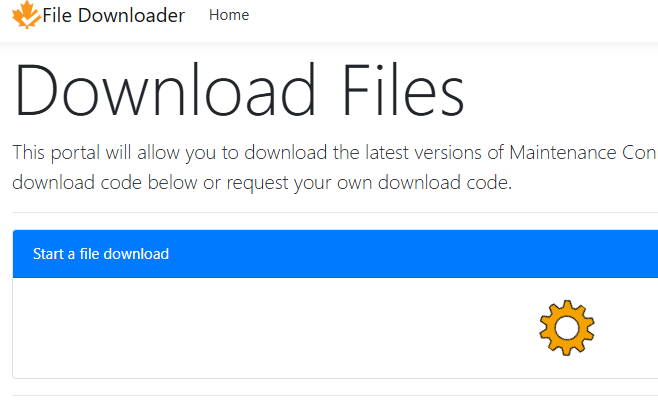
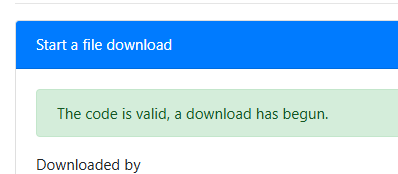
Confirmation of code and prep for download
Your browser might ask where to download it to
Or it might just decide where to put it. This is very browser, browser version and in some cases browser configuration dependent.
Then your browser will show, in whatever specific way it does it, the download progress

2. OPTIONAL IIS off
2. OPTIONAL: Turn IIS off for MCe pool.
Remember: MCe runs offline, so most users won't even notice!
There could be some minor temporary problems for users that refresh usually fix.
3 and 4. Backup the databases
3. Backup the entity database
While we almost never need the backup, but it is good to be safe.
4. Backup the reg database
While we almost never need the backup, but it is good to be safe.
5. Optional: IIS can be backed up as well
If you roll back - try just rolling IIS back first, leave the database updated.
There are almost never any problems running 'old' MCe on 'new' database structure.
Upgrade MCe before MC
There ARE occasionally issues with old MCe when Accruent makes upgrades that are NOT backwards compatible, because of course the old MCe doesn't know to handle the data differently.
It's been since 2022 since Accruent did that.
But in those cases, you would have ALSO recently upgraded MC - and got an MCe that is compatible with it, so reverting just MCe is unlikely a good choice in that situation.
To back up an IIS configuration using the Windows Command Prompt (CMD), use AppCmd.
1. Open Command Prompt as Administrator
Then go to the IIS AppCmd folder:
cd %windir%\system32\inetsrv2. Create an IIS backup
appcmd add backup "IIS_Backup"This creates a backup of your IIS configuration.
The backup will normally be stored under:
C:\Windows\System32\inetsrv\backup\IIS_BackupCheck available IIS backups
appcmd list backupRestore an IIS backup
appcmd restore backup "IIS_Backup"Example with a dated backup name
appcmd add backup "IIS_Backup_20260905" Installation
1. Verify whether LoginHub is in this install. Call us in here
If we are helping you do the upgrade, this is the point to call us in or this is the point you should be at before a scheduled meeting.
1. Verify whether LoginHub is part of the installation
You could be using LoginHub with an Identity Provider and giving features like SSO (SSO is optional but almost everyone uses SSO if they use an Identity provider)
You could be using LoginHub without an identity provider (this is rare currently but we expect that may change in the future.
So go to where you login, likely with https:://example.com/mc_web and if you get a LoginHub screen, you are running LoginHub
2. Run the MCe install upgrader
2. Run the MCe install/upgrader
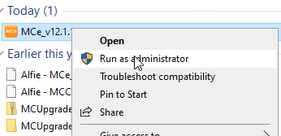
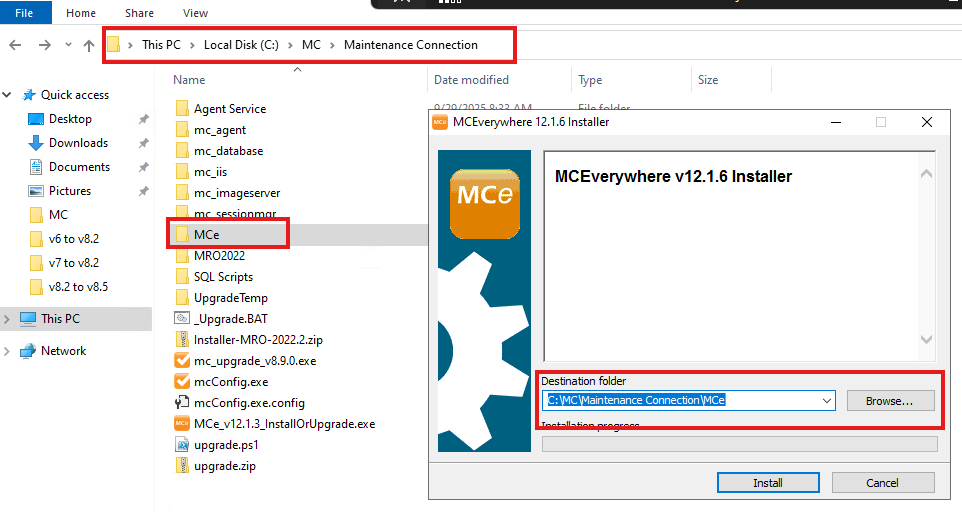
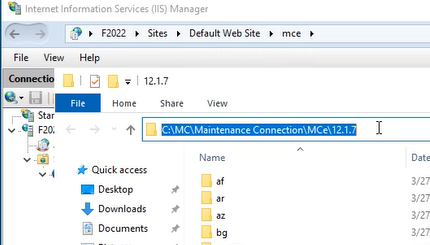
Pressing the 'install' button here actually is EXTRACTING the installer.
3. Press install and wait for extraction
3. Install button to start the extraction process
Once you confirmed that you are on the correct directory, hit the "Install" button to start.
4. Progress displayed or error(s)
4. Progress displayed or errors
You will see progress bar of the installation until you see a welcome page with the "Next" and "Cancel" button for the next process. See picture below
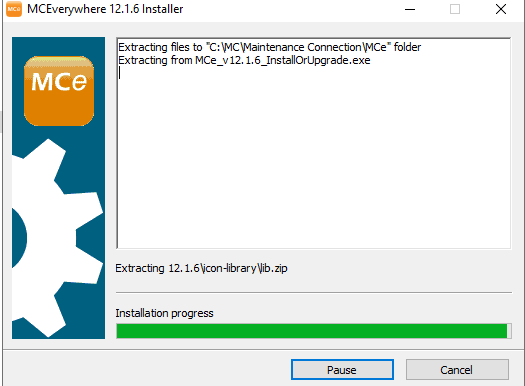
If you have more than one install, you'll next get:
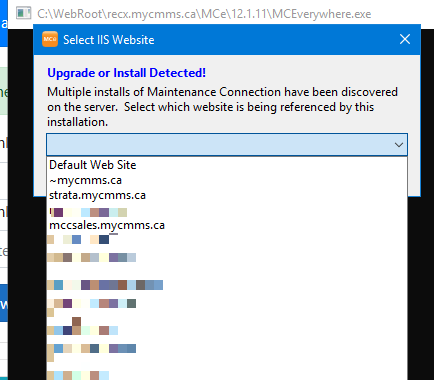
If you get an IIS not detected dialog box ... you probably forgot to run as administrator.
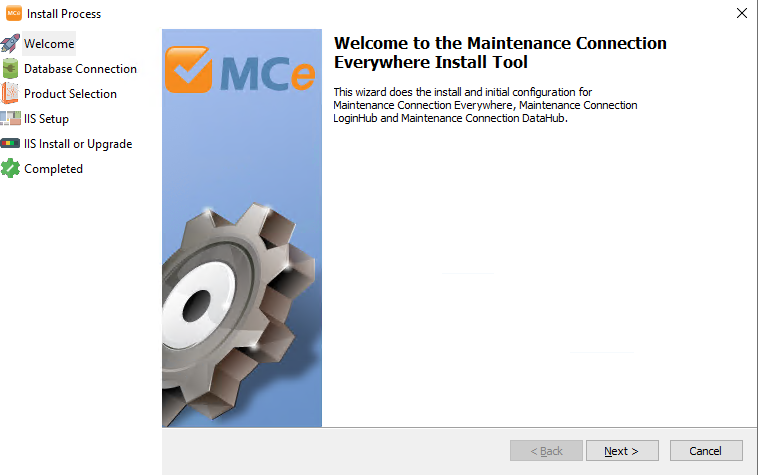
5. Next button Confirm connection settings
5. Next then Confirm connection settings
Simply hit "Next" to proceed
Confirm connection settings
You will then be asked to confirm the connection settings
Make sure they are correct and the status bar is showing green. If you are unsure, hit the "Retry" button to check the connectivity. See screenshot below
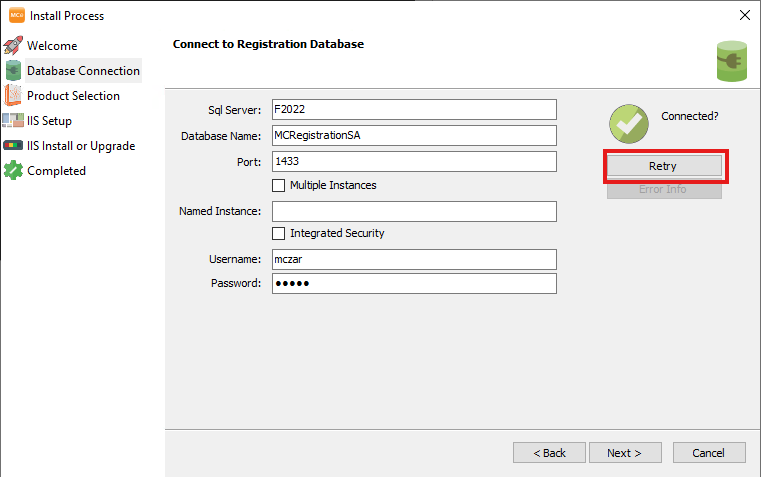
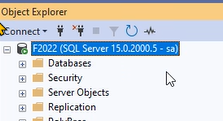
Double check that the SQL Server name is the correct one
If you check the MC LoginHub and you do NOT have LoginHub, it is not a trivial issue to fix. You need to restore the login pages and remove the changes to IIS for LoginHub, there is no 'automatic' recovery. Reinstalling won't fix it.
2 copies of default.html, in 2 directories need to have the original copies copied back, onsite.
6. Next then, 7. if LoginHub, 8. if Windows 2022 or higher (Reliability service)
6. Next to proceed
If everything is OK then hit the "Next" button to proceed to the next step.
The LoginHub and Reliability settings.
If you are using LoginHub you MUST check the MC LoginHub, if you are not you must NOT select it!
If you are running Windows 2022 or higher you usually need to select the Reliability Service. At it says, The reliability service requires port 25, so it attempts to monopolize port 25. This will cause the local SMTP relay service (or other service using port 25) to compete and potentially fail to grab it causing the Email system to stop working
The settings try to figure out the current values, they are not as accurate on SaaS, requiring extra care there, but the LoginHub at least is usually accurate for on-prem
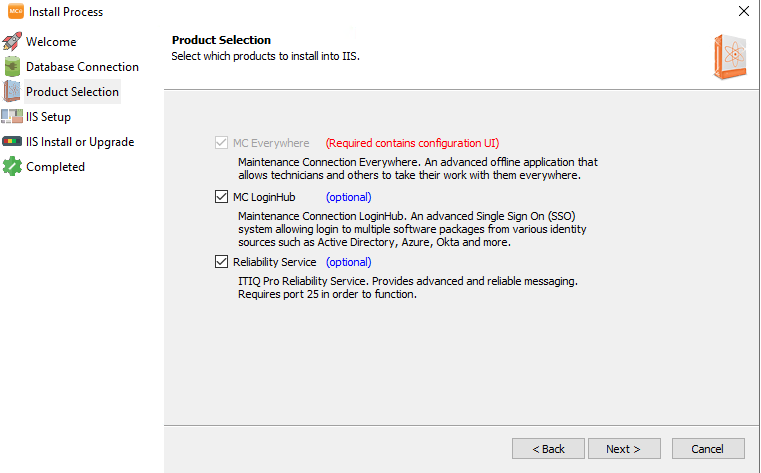
7. LoginHub? (identity provider and SSL)
You checked earlier... If you have LoginHub on your server for the authentication then tick the checkbox for MC LoginHub
8. If you are using Windows 2022 or higher, select the Reliability server
Make double sure the setting for the Reliability Service for the advanced email settings is correct.
9. Next check IIS Setup settings
9. Next Check IIS Setup settings
You will then be redirected to the IIS setup for your MCe. Normally you don't need to do anything on this page, you just need to make sure the "Server Access URL" is correct and then you may proceed by hitting the "Next button.
Fix the
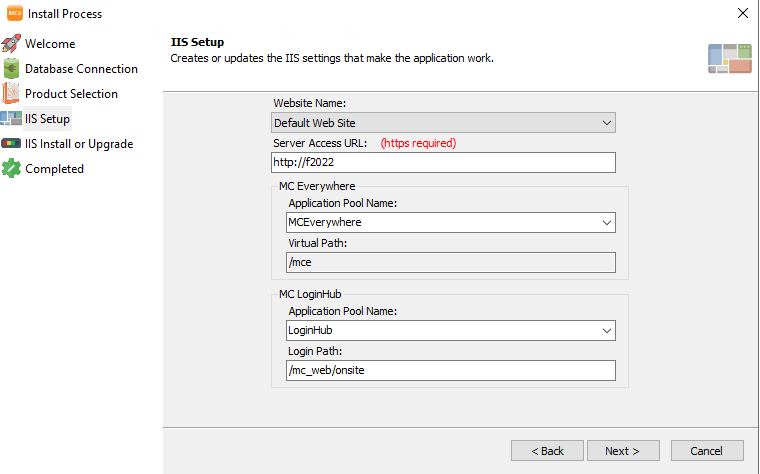
10. Click the Install or Upgrade button
11. Now you are reading to install
11. Now you are ready to install
The next page, this is important and "Install or Upgrade" button must be clicked to do the upgrade. See screenshot below, you MUST click the button that is highlighted in a red rectangle below.
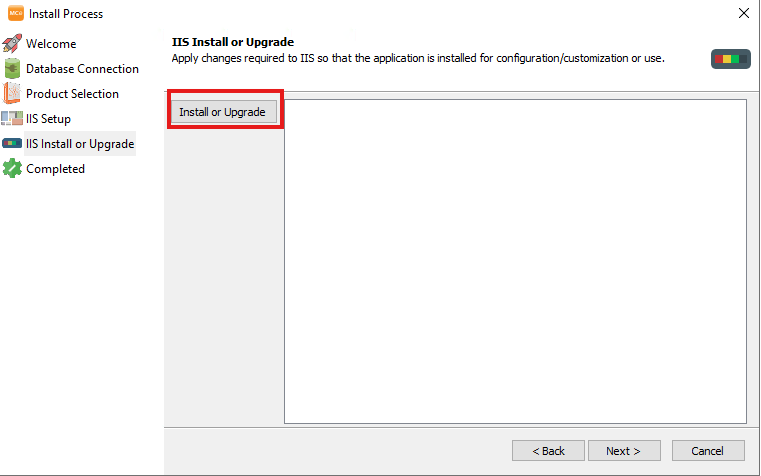
If you click 'next' before seeing what is in step 12 - nothing will be installed.
12. Installation Progress. Please be patient.
12. Progress, please be patient
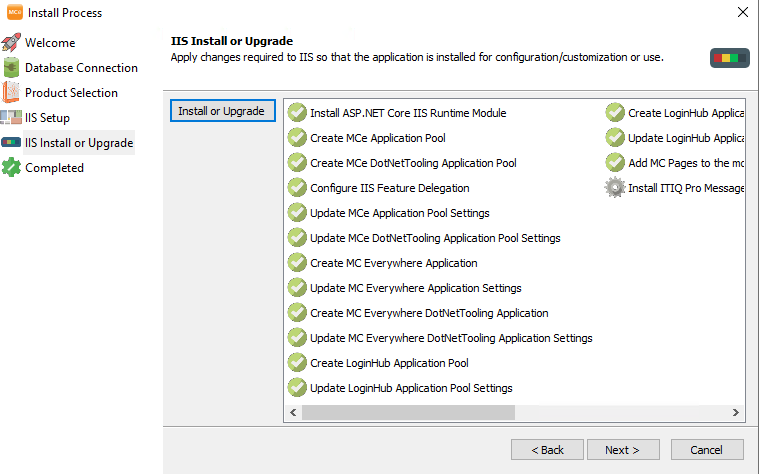
Once you clicked on the "Install or Upgrade" button a progress bar will show as a proof of an upgrade happening. See screenshot below. The number of items that show up will depend on what settings you picked above, it could be one or two columns of items.
13. Verify then complete
13. Verify then complete
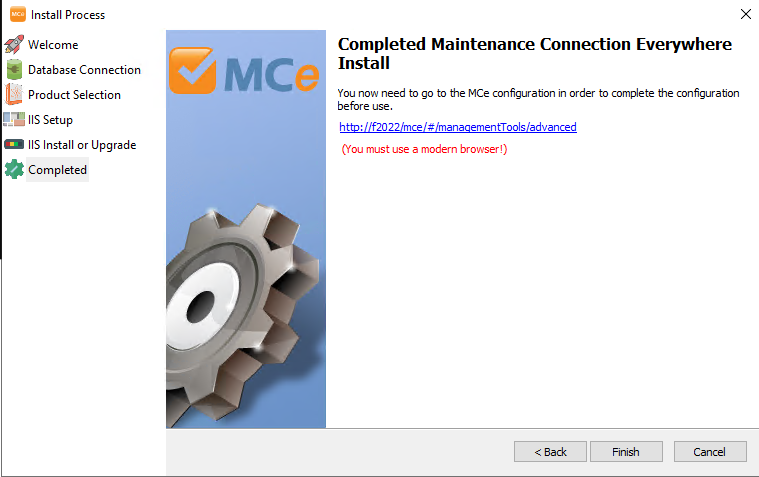
Once they all show as green or checked icon, then hit Next to proceed and you are done.
SQL
- Some on-prem systems don't give our SQL user account enough privileges to do the table structure upgrades.
- If so ... you probably know who you are! If that is the case you have a couple options,
- Option 1: Temporarily give the user you have defined for MCe higher permissions
- Option 2: run the upgrade scripts manually (they run slower in SSMS than in our code... except when our code doesn't have permission and they don't run!)
At this point you are done with the IIS Web install
Database upgrades
Running MC 8.9? This step is mandatory
If you are on MC 8.9 you must run THIS script manually with enough permissions, if you are running MC 2021 or newer you don't need to do this:
IF NOT EXISTS (
    SELECT *
    FROM INFORMATION_SCHEMA.COLUMNS
    WHERE TABLE_NAME = '_schema'
      AND COLUMN_NAME = 'id'
)
BEGIN
    PRINT 'Adding Id column to _schema table';

    ALTER TABLE _schema
        ADD id INT IDENTITY(1,1)
        CONSTRAINT [PK_Schema] PRIMARY KEY CLUSTERED ([Id] ASC);
END
GO
Make sure you have 3 checkmarks for the the database updates
The first check mark is just whether it can connect.
The second two run the upgrade of the database. Just by 'coming here' they start to run. But you should check after and upgrade by clicking on the recheck buttons in order.
If you need the SQL to run in SSMS instead of here - click on the Upgrade SQL
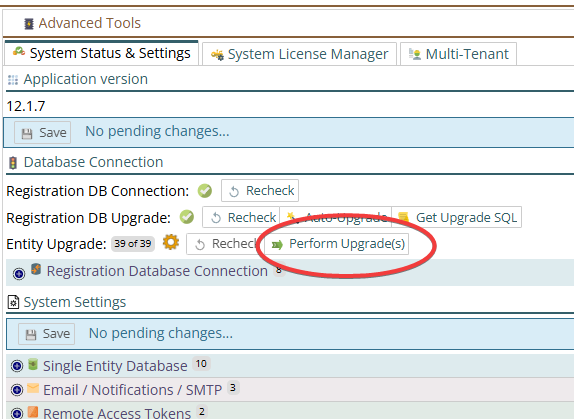
Steps to getting 3 green checkmarks
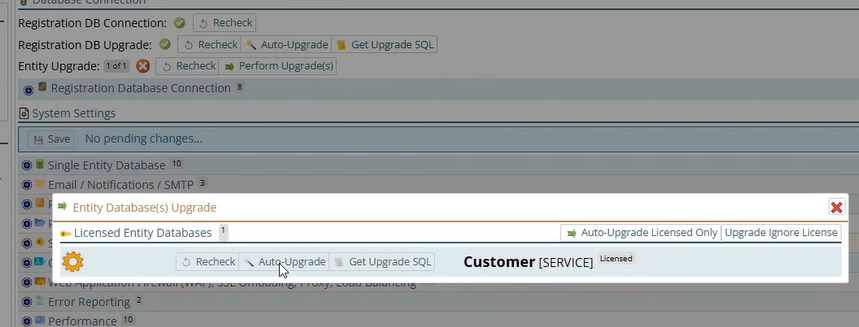
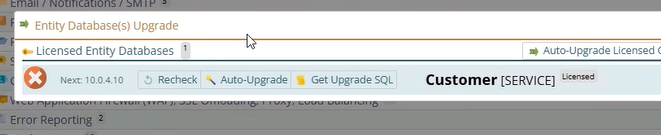
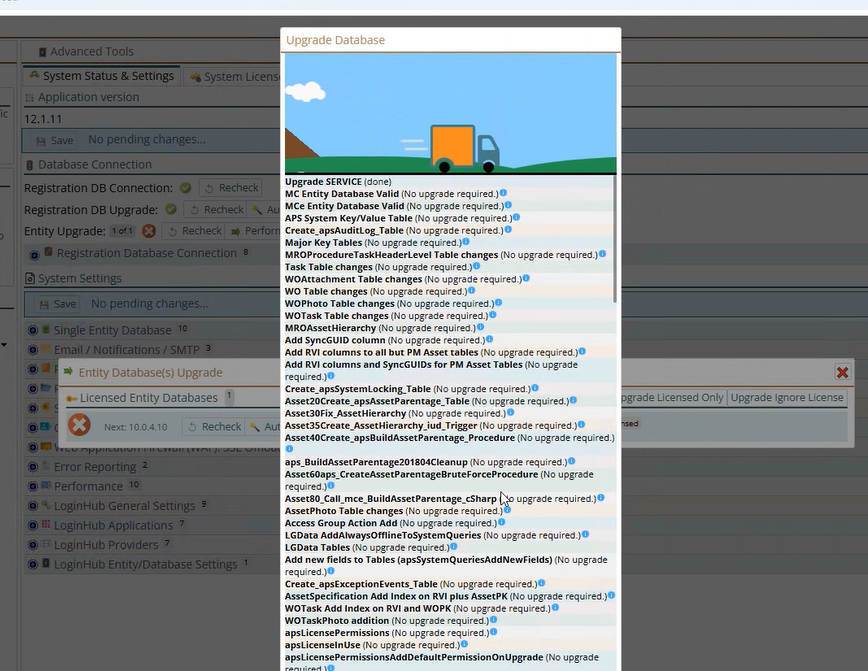
It will give you a quick message (toast) when done

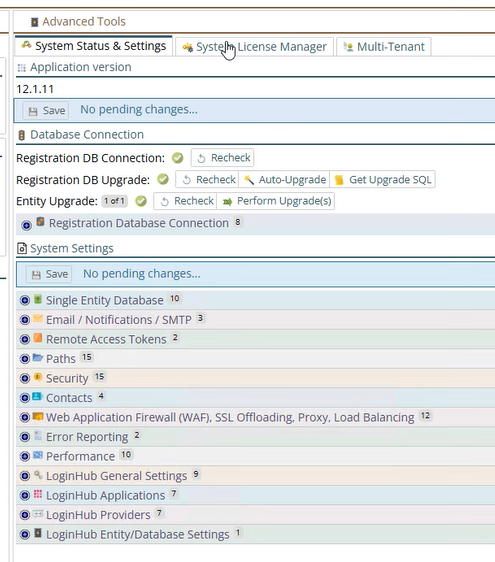
Do a quick test to log in
Do a quick test to log in:
If you get the following 2, likely you don't have LoginHub but you clicked on the LoginHub option above. You will need to repair the installation. See above.
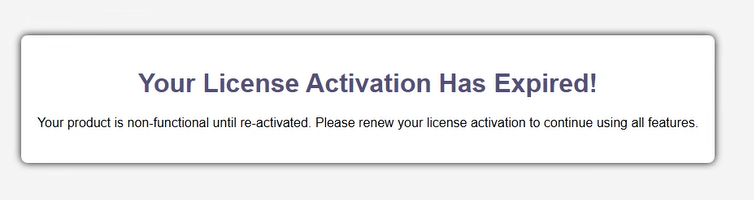
Run the database upgrades more manually.
Some on-prem systems don't give our SQL user account enough privileges to do the table structure upgrades.
- If so ... you probably know who you are! If that is the case you have a couple options,
- Option 1: Temporarily give the user you have defined for MCe higher permissions
- Option 2: run the upgrade scripts manually (they run slower in SSMS than in our code... except when our code doesn't have permission and they don't run!)
Option 1
Run it remotely. For instructions on this MCe Upgrade - Triggering MCe database Upgrade remotelyIt also has instructions for creating SQL scripts that you run in a tool like Microsoft's SSMSOption 2
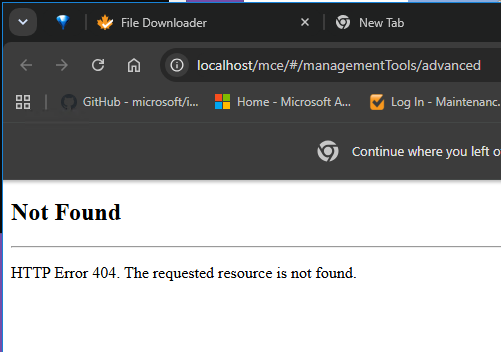
If you are still on the Web/App server, you can do it this way:Load a modern browser that is up to date, you should likely use Chrome. Do NOT use IE. There are problems reported with Edge.Run against the HostnameDo NOT run on 127.0.0.1 !! This can cause problems, and they aren't always obvious at first. The extent of the problems depends on timing, but there will be problems so don't do this.Running from the IIS server, Double click on one of the MCe logos
 a
a
Click on Advanced Tools
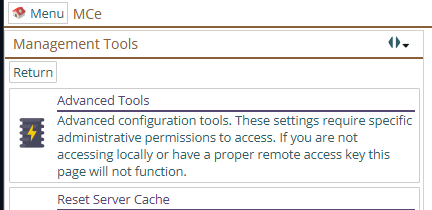
if you get:
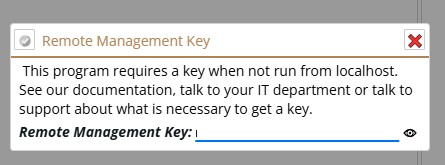
you aren't running it on the server, or the app can't tell that you are on the server. Don't run with a URL that makes it looks like it is not running from the server, and you may not have your hosts file set up correctly.
Fixing a broken Hosts file
Quickest Method (NotePad++ or NotePad.)
1. Open Notepad(++) or your tool as Administrator:
- Press the Windows key, type "Notepad".
- Right-click on Notepad and select "Run as administrator".
2. Open the File:
- In Notepad, go to File > Open.
- Paste the following path into the address bar at the top and press Enter:
C:\Windows\System32\drivers\etc. - Change the file filter in the bottom-right corner from "Text Documents (.txt)" to **"All Files (.*)"**.
- Select the file named
hosts(it has no extension) and click Open.
3. You need to point the sub domain to 127.0.0.1 so it pulls the sub domain as local domain.
So let's say your users connect to MCe by typing: https://cmms.example.com/mce you would use
# Copyright (c) 1993-2009 Microsoft Corp.
#
# This is a sample HOSTS file used by Microsoft TCP/IP for Windows.
#
# This file contains the mappings of IP addresses to host names. Each
# entry should be kept on an individual line. The IP address should
# be placed in the first column followed by the corresponding host name.
# The IP address and the host name should be separated by at least one
# space.
#
# Additionally, comments (such as these) may be inserted on individual
# lines or following the machine name denoted by a '#' symbol.
#
# For example:
#
#      102.54.94.97     rhino.acme.com          # source server
#       38.25.63.10     x.acme.com              # x client host

# localhost name resolution is handled within DNS itself.
#	127.0.0.1       localhost
#	::1             localhost


127.0.0.1			cmms.example.com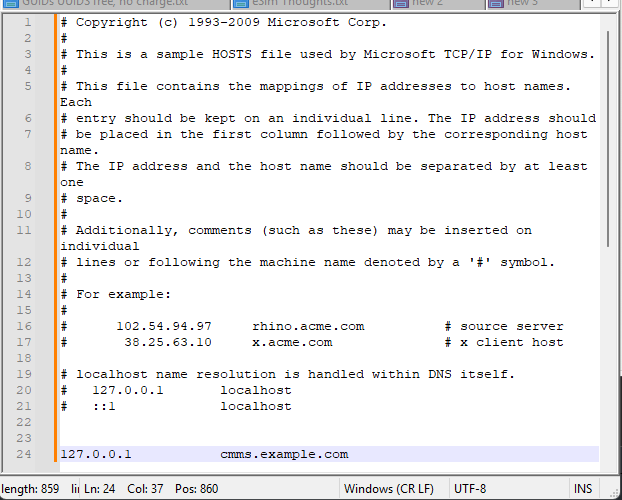
Similar instructions for your favorite text editing tool like VSC, or at least the tools available on the server.
When the upgrade is complete, go to the next step
Install complete, Cleanup time
If you elevated the permissions of the SQL user for MCe, you may want to dial them back now
Turn IIS pool back on
Appendix: Backup IIS configuration
You can run the following scrip inside a PowerShell on your app/web server to backup your IIS configuration
$backupName = "IIS_Config_Snapshot_$($(Get-Date).ToString("yyyyMMdd_HHmmss"))" & $env:SystemRoot\System32\inetsrv\appcmd.exe ADD backup "$MC2025UpgradePrep"Record the name
If you need to rollback, replace the 20260323_141401 part with the name you saved above
## Restore the backup
$backupNameToRestore = "IIS_Config_Snapshot_20260323_141401" & $env:SystemRoot\System32\inetsrv\appcmd.exe RESTORE backup "$MC2025UpgradePrep"