

 Maintenance Connection Everywhere (MCe) · EAM/CMMS manuals
Unless your admin has removed it, the Home page will have 'Timesheet' as one of the options. Technicians can edit their own timesheet. Administrators can edit themselves and others.
Totals are shown at the top and contain all the totals from the live rows. Rows you are 'thinking about' adding from the "Possible Entries" don't count into the daily counts until you commit them (hit the save button). You can edit them after you commit them.
If you have times in WOs for this week, at the top you will see a section with a header "Actual Entries"
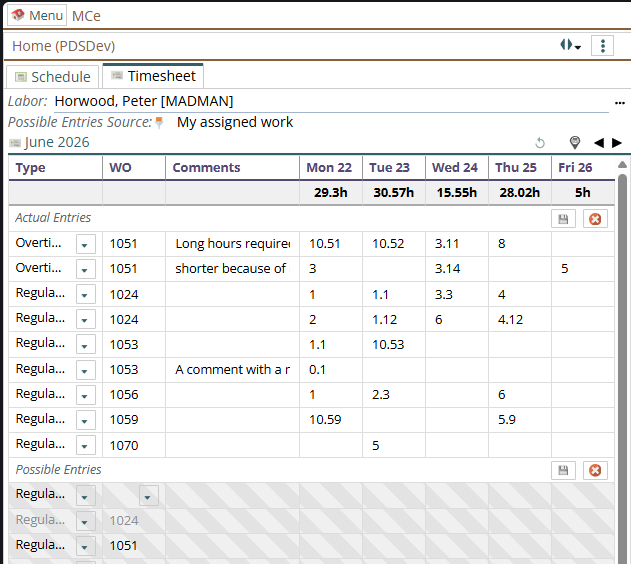
In many cases, all you need is to adjust/add/delete times in that set.
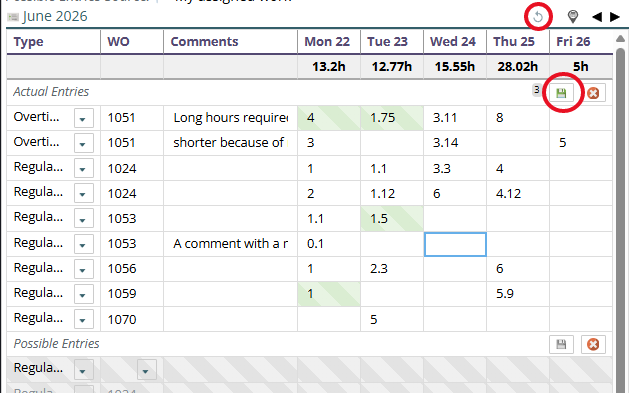
The image above shows 3 rows with changes (see the "3" in the bullet as well), and it shows 2 changes on the 1st row. Once you are happy with your changes, press the save button (highlighted) If you want to start over, the reload button, also highlighted at the very top, will erase your changes and let you start over.
Bottom section, controlled by query at top
The 1st 'Possible Entries' row is blank for you to pick a work order and other values. Until you have on the row a work order and one hour value (can be a fraction of an hour such as 0.2, it doesn't have to be an integer), the row is not ready to be saved.
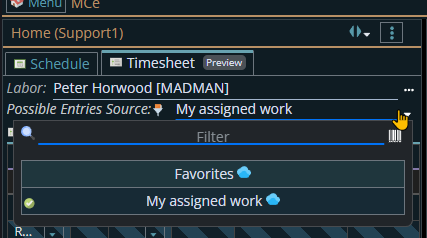
In a default setup, you will have two queries you can go back and forth between for this bottom section. The screen shot below shows the 'My Assigned Work' currently selected, but I can choose Favorites. You administrator may have added to, removed from or changed these. In the screen shots above you can see what it looks like if your Administrator only gives you access to one, the dropdown disappears and just shows the one selected.
The row below is not ready because it doesn't have a WO picked the diagonal color bars, grey below, shows that it is not ready

The row below is not ready because it doesn't have any hours entered

A comment isn't enough you need hours: Here the diagonal bars are shades of green showing it is ready to be saved now, but that it hasn't been saved/committed to.

Once it is ready to be saved the row will show up with green strips (Since color deficiencies aka color blindness is either red/green or blue/yellow, the steel grey/blue switching to green should visible to most people either as color or tonal differences.)

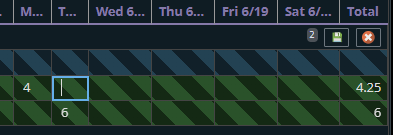
The icon beside the row(s) save button shows how many rows will be saved. 1 in the example below:
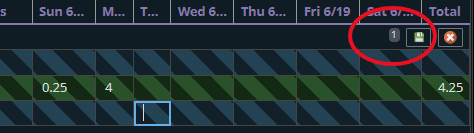
and two in the example below:
The following buttons let you move to 'today', or move back or forward one week at a time.

If you have an admin level license, you will be able to edit the timesheets for others.
Advanced
Edit button for seeing the WO details quickly and easily.
Greyed out rows in the bottom means it's already in the top section at least once.
This next screen shot holds two points of interest:
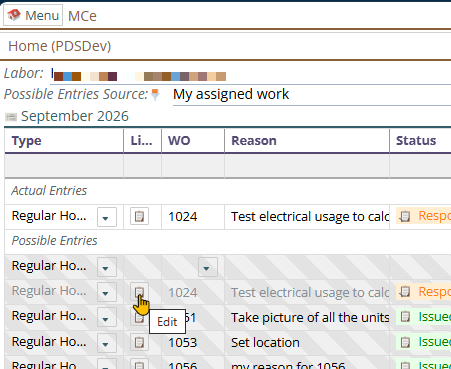
The first is the column that gives a button that lets you go to the Work order in the panel to the right. The finger pointing is hovering over one of them. Click on that Edit button and in the panel to the right the work order will be opened to let you view and edit it in detail, and from there of course you go further such as opening up the asset.
The second is ... notice the row that I was about to click on the text is greyed out. Why? Look up in the Actual Entries. That WO is already up there in at least one row. So while you can add additional, it's letting you know you probably just want to edit it above, not here. So it is greyed out suggesting you probably don't want to edit it down in this section, but it doesn't prevent you from if you really want to.
So why might you want to? Probably the most common will be because you want some regular hours and some overtime hours for the same work order.
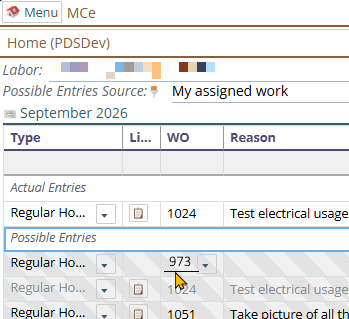
Quick picking the work order when you know it by number
Instead of using the favorites, if you have memorized a work order you use a lot, it may be quicker to just type the work order number. To do this, click on the blank part beside the drop down and ten type it in. (This feature is scheduled for version 12.1.13)
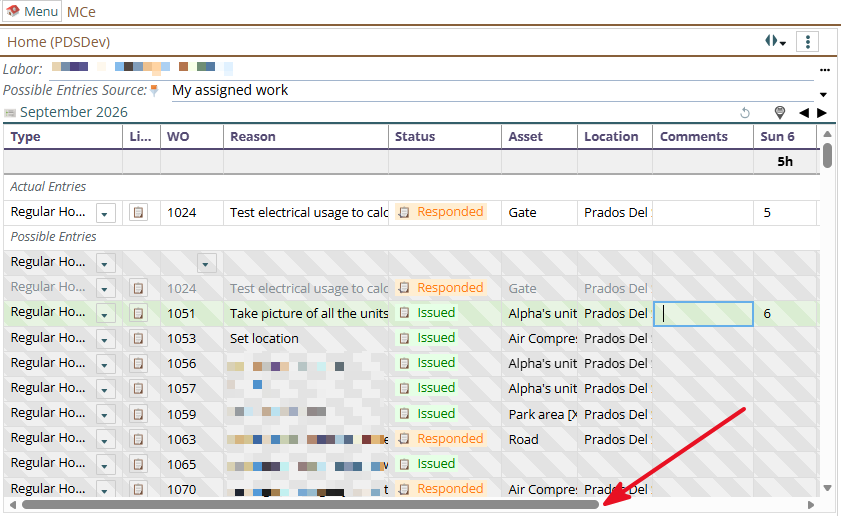
Problem, the save button is missing!
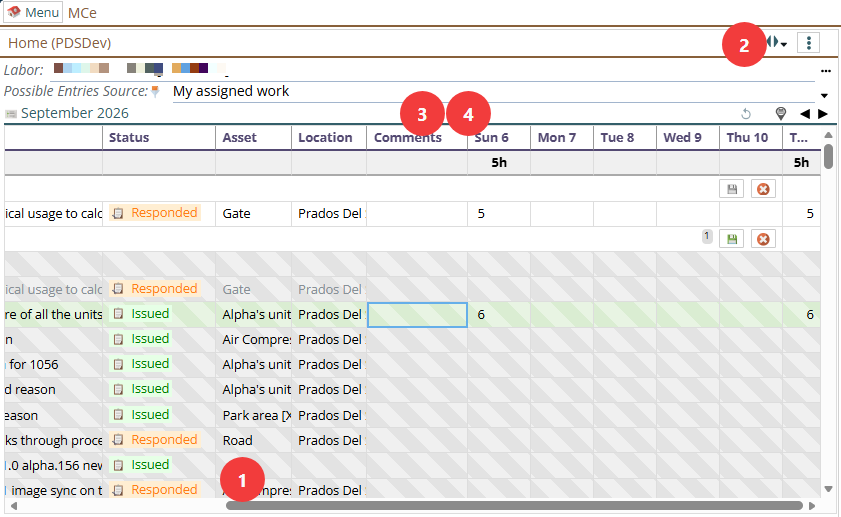
So here I have entered 6 in the hours for Sunday and the row is highlighted (green for fully sighted people), showing it is ready to be saved. But there is no save button. Look at the arrow, it shows that the screen is only showing part of the timesheet, the left part.
Your most practical options are:
Scroll to the right
1. Simply scroll over to the right. This is probably the best option on a cell phone or portrait tablet since it is easy to scroll with your fingers and there just isn't all that much space available no matter how much of the other suggestions you are able to follow. It's not a bad choice for a bigger screen but perhaps not the best choice for a bigger screen.
Make the window wider
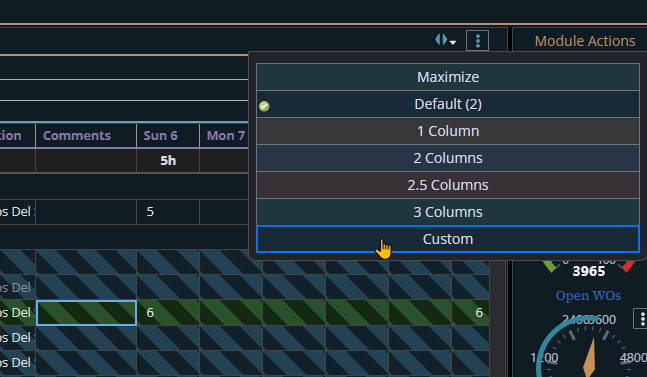
2. Make the window wider, if you are on a device that is large enough to:
Make some columns narrower
3. Make some of the columns narrower.
Remove unnecessary columns
4. Ask one of your administrators to remove unnecessary columns for you, maybe for everyone.
Bonus 1: Rotate your phone or tablet
Rotate your phone or tablet to landscape, then hit the save button
Bonus 2: Wait until you can use your laptop
Wait until you can use your laptop or desktop, then do it there.
Bonus 3: Edit WO
Don't make changes in this view, use this view to orient yourself, then click to go to the work order and edit it there